🌐 在 cloudflare 部署 Hugo 构架博客的 manual
Lithos
本文内容在sunnyseeds 的个人博客的基础上进行增补
前言
一直听说建博客可以薅 github 和 cloudflare 羊毛,而且很容易实现。真正做了一遍,竟发现网上找到的文章,都有坑。
包括 hugo、cloudflare 官网,以及 GPT 的说辞。
前提:你的终端 cli 得能够较为稳定的 访问 github。
(否则,即便照着官网文章逐字逐句操作也会任意变形……别说我没提醒你)
一、hugo init 博客项目
安装 hugo
brew install hugo # MacOS
创建 hugo 站点
hugo new site <your_blog_project_name>
# 这将会创建一个名为 your_blog_project_name 的项目
配置 hugo 主题
1、从项目的根目录中,启动 hugo 模块系统(如果您还没有这样做):
hugo mod init github.com/<your_user>/<your_project>
2、进入我们刚创建的 hugo 站点文件夹里, 打开 hugo.toml 文件(某些版本也叫 config.toml)。它位于项目名根目录下的第一层。
~ 这里有一个坑,ayu’s 例子中用的 newsroom theme 似乎有问题:github.com/onweru/newsroom
按下面修改:
baseURL = 'https://blog.sunnyseeds.net/'  # 你购买的域名
defaultContentLanguage = "zh-cn" # 默认语言
defaultContentLanguageInSubdir = false #不在URL显示当前语言
languageCode = 'zh-cn'
title = "sunnyseeds' Blog" # Blog title
theme = ["github.com/theNewDynamic/gohugo-theme-ananke"] # 你选择的主题
hasCJKLanguage = true # CJK 为中国, 日本, 韩国的缩写
canonifyurls = true
pagination.pagerSize = 6

[module]
[[module.imports]]
  path = "github.com/theNewDynamic/gohugo-theme-ananke"
Ananke: Hugo 主题里有一个更详细的例子,可以控制主题的方方面面,我暂时没有使用
拉取 主题 仓库到本地
在你的 Hugo 网站根目录内运行:
git init

git submodule add https://github.com/theNewDynamic/gohugo-theme-ananke.git themes/ananke
注意:git submodule add 用于将另一个 Git 仓库作为子模块添加到现有的 Git 仓库中。子模块的提交和更新是通过主仓库的 .gitmodules 文件来管理的。它记录了 GitHub 上复制下来的主题的项目路径。这个很可能就是下面报错的原因(使用submodule 才会有 .gitmodules 文件,嵌套 git 不好带啊):
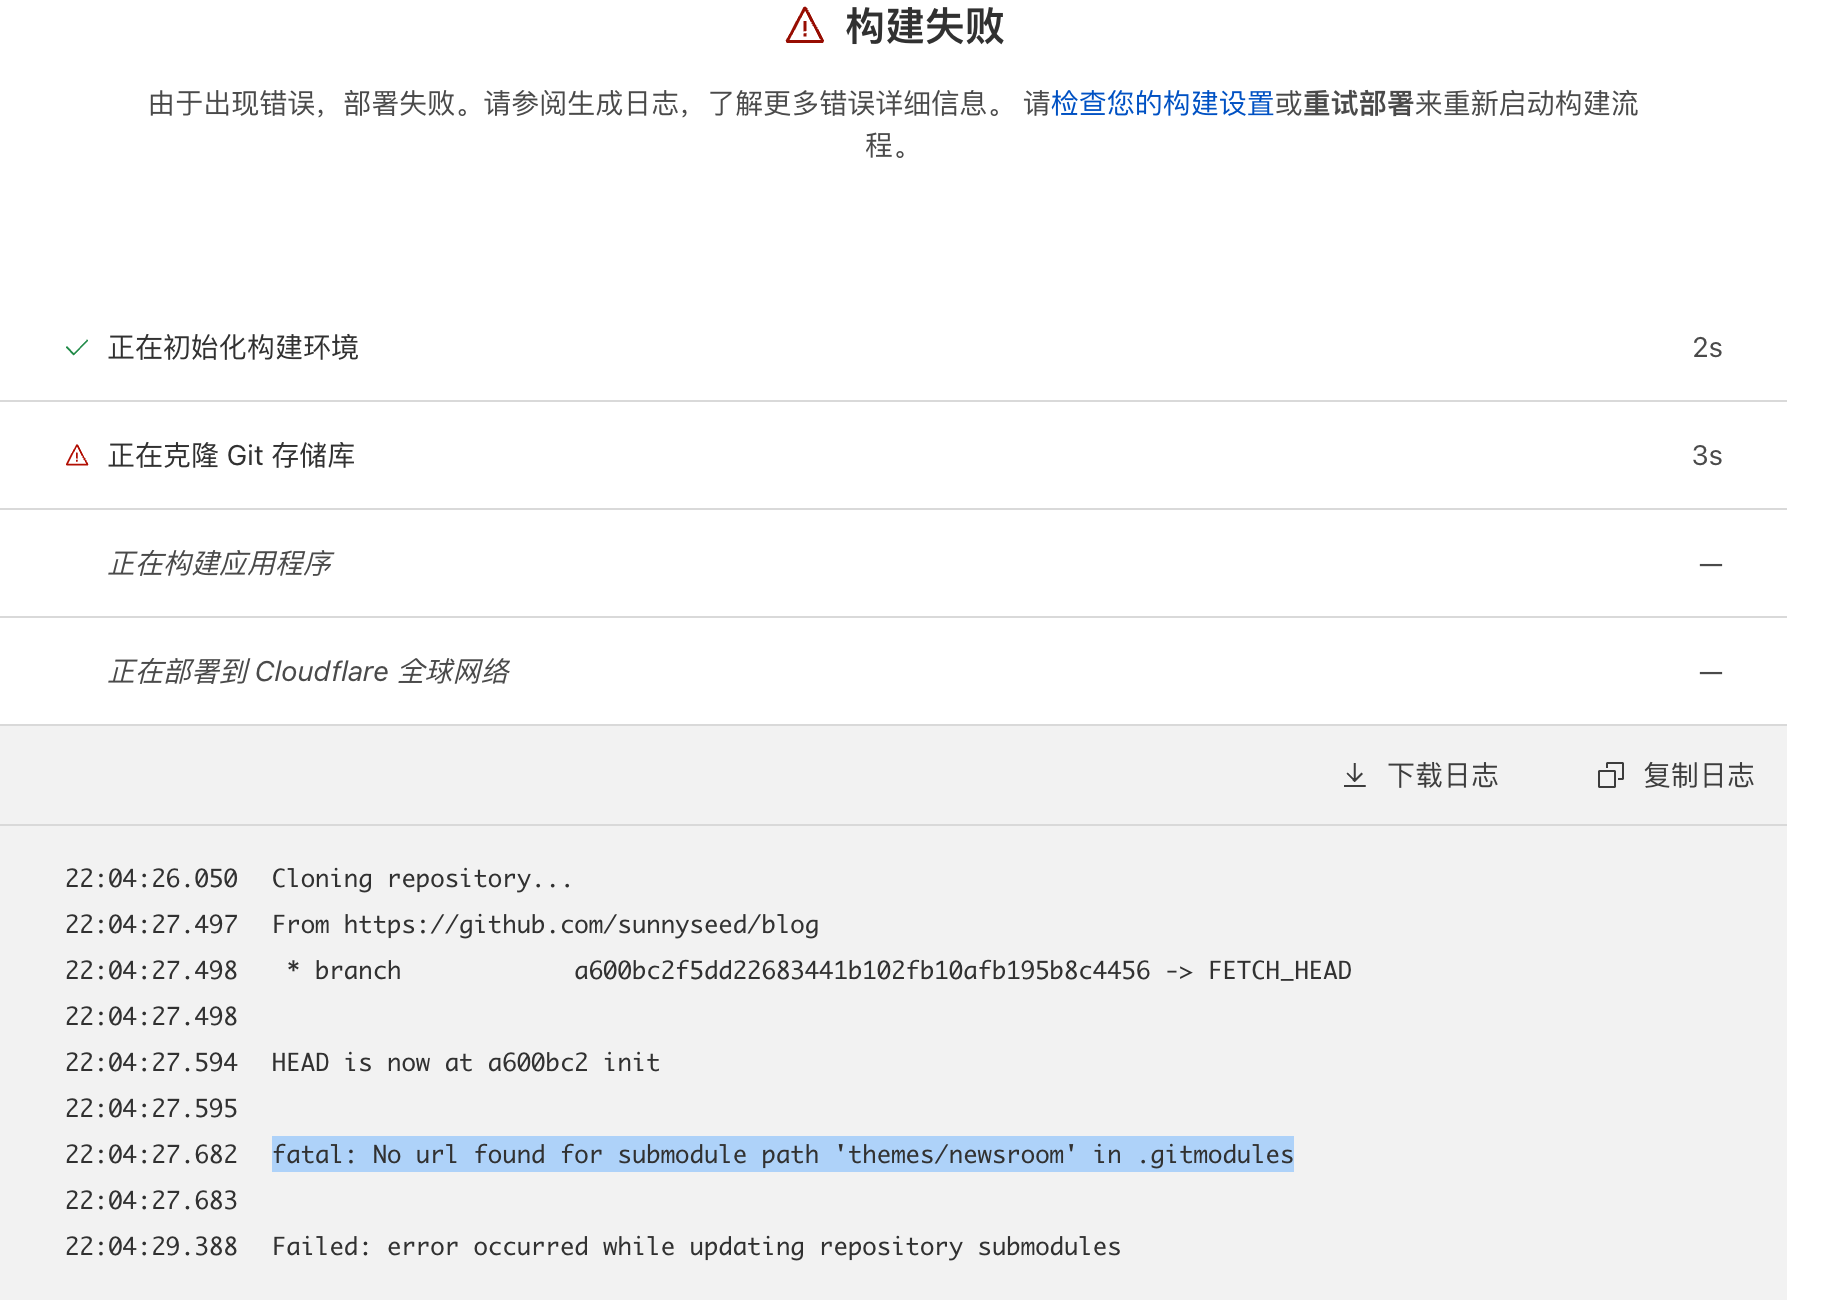
如果这个问题得不到解决,你可以尝试把配置文件(hugo.toml)进行如下修改(省略了主题的路径,交给 .gitmodules 寻路):
baseURL = 'https://blog.sunnyseeds.net/'  # 你购买的域名
defaultContentLanguage = "zh-cn" # 默认语言
defaultContentLanguageInSubdir = false #不在URL显示当前语言
languageCode = 'zh-cn'
title = "sunnyseeds' Blog" # Blog title
theme = 'anake' # 你选择的主题
hasCJKLanguage = true # CJK 为中国, 日本, 韩国的缩写
canonifyurls = true
pagination.pagerSize = 6
创建新帖子
hugo new content posts/hello-world.md
hugo 的每一篇 post 前,需要有 toml 或 yaml 格式的 front matter,用于控制文章显示。
修改 contents\posts\hello-world.md
hugo 网站架构支持两种比较容易理解的代码(比 html 接近自然语言) yaml 格式:用冒号衔接变量与参数。 toml 格式:用等号衔接变量与参数。 两种格式的编辑都需要上下用“—”包裹。两种语言不能混合使用,否则 Cloudflare 会报错。 可包含的内容有: title, date, draft, featured_picture, summary, tag 等等。
注意,要删除 draft = true 这一行,否则不会显示
再注意,**一定要确保 md 文件位于 content/posts/ 目录下,而不是直接裸露在 content/ 下,这会导致显示功能异常。**不要问我怎么知道的。
本地预览
hugo server
按照 2、在部署到 Cloudflare 时发生致命错误 - HUGO 支持文档 这一步之前还有手动 npm ci 处理过程,但我没有使用,可能新版不需要?
二、上传 github
1、生成 repository
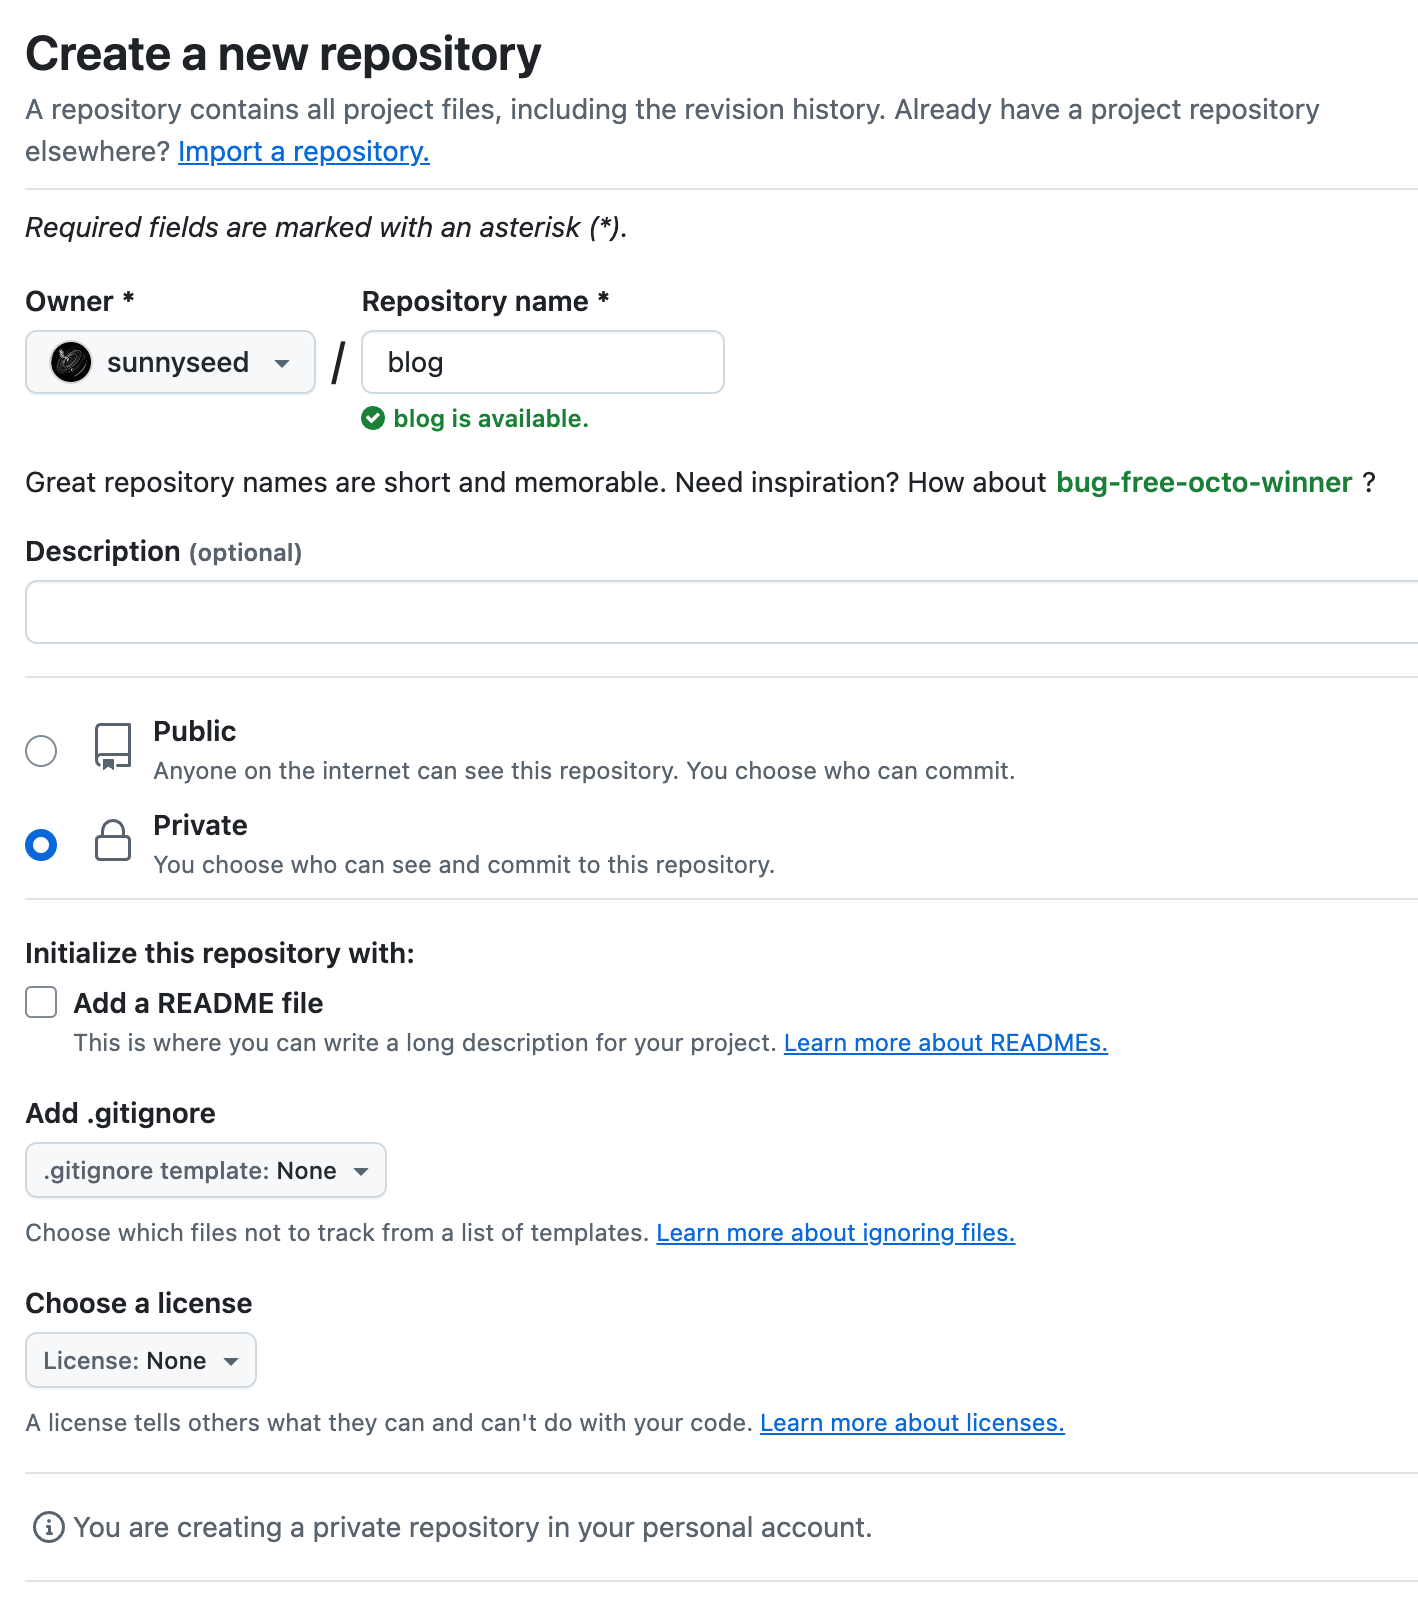
2、create a new repository on the command line
进入blog 所在目录
git commit -m "first commit"
git branch -M main
git remote add origin https://github.com/sunnyseed/blog.git
git push -u origin main
之后再次修改的话:
git add .
git commit -m "xxx"
git push -u origin main
如果是使用 ssh 登录 github,则要使用:
git remote add origin git@github.com:sunnyseed/blog.git
注意,GitHub上一定要批准 configure 一下 cloudflare 对于该项目目录的访问权。
三、设置 cloudflare
按照 1、Hugo 部署 | Cloudflare Pages 文档 设置即可,其中构建命令(我照抄的,不知为啥😄):
hugo -b $CF_PAGES_URL
补充,又是坑:-b 是固定 baseurl 的意思(就是网站的 基本 URL,固定成 cf page 的地址),如果你有注册网址的话,用默认的:hugo 才行(也就是如果你在比如 Cloudflare 上购买了域名的话)。这么写会导致错误的,当时我还没反应过来。
随后确认在 构建 时,没有报错即可,就可以使用 pages 分配的域访问了(比如 myblog-dg4.pages.dev)。本地更新后只需要,push 一下,cf 是自动更新发布的。
四、绑定域名
-
在 域注册-DNS 中加一个 CNAME (比如 blog )记录,将你的域名指向 pages 分配的域名比如 myblog-dg4.pages.dev,注意,不要包括版本号(否则你每更新一次就得换个记录,依旧不要问我怎么知道的)。
-
在 pages 的 自定义域中,加入一个指向 CNAME (blog.ne’ro-lithos.com) 的记录。
就可以访问 (blog.ne’ro-lithos.com)使用了。
五、图片设置
为首页设置 “Hero” 图
首页的设置通常在 content/_index.md 文件中进行。在这个文件的 front matter 中,你可以使用 featured_image 参数来指定 Hero 图。打开 content/_index.md 文件(如果不存在,则创建一个),并添加以下内容:
# yaml
title: "Lithos' Blog"
description: "a CUHKSZ survival documentation"
featured_image: '/images/Head.jpg'
将 images/Head.jpg 替换为你实际图片名称。确保该图片已上传到 static/images 目录中。
为 post 设置 “特写” 图
post 的特写图,写在每一个 post 的 front matter 中:
# toml
title = ' # Grassroot HongKong'
date = 2024-09-10T09:08:58+08:00
draft = false
featured_image = '/images/ymt.jpg'
补充:
手工测量了一下,Ananke 的 hero 通栏图片的长宽比例是 1 : 0.28(这在 1980 分辨率上,尺寸约 1905 * 534)。 不用很精确,hugo 会自己 cut 下面多余部分。
文章中的普通图片
渲染方式为:
我暂时使用的是 https://postimg.cc/ 作为存储库,但如果你有兴趣,且像我一样决定永远注册一个私人域名,你也能直接存在自己的子域名上(以我为例,可以存在 “images.nero-lithos.com" 上)
六、评论功能
如果你有个人服务器,请采用 Commento 的服务,它更方便。本篇展示 Disqus 提供的评论区服务,零基础。
在 Disqus 官网上注册一个新号,并关联你的博客的域名,选择一个网页shortname,并记住它。然后选择 Universal Code-Installation 来部署 Disqus,跟随官网上的信息,我们需要修改三个文件:
-
hugo.html里增加:
[services] [services.disqus] shortname = 'nero-lithos' -
themes/anake/layouts/_default 中找到 single.html,里面应当是以下内容:
{{ define "header" }} {{/* We can override any block in the baseof file be defining it in the template */}} {{ partial "page-header.html" . }} {{ end }} {{ define "main" }} {{ $section := .Site.GetPage "section" .Section }} <article class="flex-l flex-wrap justify-between mw8 center ph3"> <header class="mt4 w-100"> <aside class="instapaper_ignoref b helvetica tracked ttu"> {{/* CurrentSection allows us to use the section title instead of inferring from the folder. https://gohugo.io/variables/page/#section-variables-and-methods */}} {{ .CurrentSection.Title }} </aside> {{ partial "social-share.html" . }} <h1 class="f1 athelas mt3 mb1"> {{- .Title -}} </h1> {{ with .Params.author | default .Site.Params.author }} <p class="tracked"> {{ $.Render "by" }} <strong> {{- if reflect.IsSlice . -}} {{ delimit . ", " | markdownify }} {{- else -}} {{ . | markdownify }} {{- end -}} </strong> </p> {{ end }} {{/* Hugo uses Go's date formatting is set by example. Here are two formats */}} {{ if not .Date.IsZero }} <time class="f6 mv4 dib tracked" {{ printf `datetime="%s"` (.Date.Format "2006-01-02T15:04:05Z07:00") | safeHTMLAttr }}> {{- .Date | time.Format (default "January 2, 2006" .Site.Params.date_format) -}} </time> {{end}} {{/* Show "reading time" and "word count" but only if one of the following are true: 1) A global config `params` value is set `show_reading_time = true` 2) A section front matter value is set `show_reading_time = true` 3) A page front matter value is set `show_reading_time = true` */}} {{ if (or (eq (.Param "show_reading_time") true) (eq $section.Params.show_reading_time true) )}} <span class="f6 mv4 dib tracked"> - {{ i18n "readingTime" .ReadingTime }} </span> <span class="f6 mv4 dib tracked"> - {{ i18n "wordCount" .WordCount }} </span> {{ end }} </header> <div class="nested-copy-line-height lh-copy {{ $.Param "post_content_classes" | default "serif"}} f4 nested-links {{ $.Param "text_color" | default "mid-gray" }} {{ cond (eq $.Site.Language.LanguageDirection "rtl") "pl4-l" "pr4-l" }} w-two-thirds-l"> {{- .Content -}} {{- partial "tags.html" . -}} <div class="mt6 instapaper_ignoref"> {{ partial "disqus.html" . }} </div> </div> <aside class="w-30-l mt6-l"> {{- partial "menu-contextual.html" . -}} </aside> </article> {{ end }} -
themes/anake/layouts/partials 中找到或创建 disqus.html,里面应当是以下内容:
{{- $pc := .Site.Config.Privacy.Disqus -}}
{{- if not $pc.Disable -}}
{{ if .Site.Config.Services.Disqus.Shortname }}<div id="disqus_thread"></div>
<script>
    window.disqus_config = function () {
    {{with .Params.disqus_identifier }}this.page.identifier = '{{ . }}';{{end}}
    {{with .Params.disqus_title }}this.page.title = '{{ . }}';{{end}}
    {{with .Params.disqus_url }}this.page.url = '{{ . | html  }}';{{end}}
    };
    (function() {
        if (["localhost", "127.0.0.1"].indexOf(window.location.hostname) != -1) {
            document.getElementById('disqus_thread').innerHTML = 'Disqus comments not available by default when the website is previewed locally.';
            return;
        }
        var d = document, s = d.createElement('script'); s.async = true;
        s.src = '//' + {{ .Site.Config.Services.Disqus.Shortname }} + '.disqus.com/embed.js';
        s.setAttribute('data-timestamp', +new Date());
        (d.head || d.body).appendChild(s);
    })();
</script>
<noscript>Please enable JavaScript to view the <a href="https://disqus.com/?ref_noscript">comments powered by Disqus.</a></noscript>
<a href="https://disqus.com" class="dsq-brlink">comments powered by <span class="logo-disqus">Disqus</span></a>{{end}}
{{- end -}}
然后,就会在每篇博客底下看到 Disqus 评论区(实时加载的)。
Reference
1、Hugo 部署 | Cloudflare Pages 文档